[three.js][typescript] - Material(6)
[three.js][typescript] - Material(5)[three.js][typescript] - Material(4)[three.js][typescript] - Material(3)[three.js][typescript] - Material(2)[three.js][typescript] - Material(1)Three.js 의 Object3D의 파생클래스는 위와 같다. Point는 Geometr
yoohwanihn.tistory.com
이전 글에 이어서 Texture Mapping의 속성 중에서 roughness, metallic, alpha에 대해 알아보자
roughness
roughness를 설정하는 옵션은 roughnessMap이다.
위와 같이 roughnessMap 옵션의 값을 기존에 로드해둔 Texture 객체로 설정해 준다.

해당 Texture 이미지는 위와 같다.
roughnessMap 옵션에서 이미지의 픽셀 값이 밝은 부분이 더 거칠기가 강하게 나타나며,
어두우면 거칠기가 더 약하게 나타난다.
렌더링 된 결과를 토대로 비교해 보자
Sphere Geometry로 비교해 보겠다.
푸르스름한 구체를 담당하는 Material은 거칠기가 낮아져서 반사가 되는 것을 확인할 수 있지만
검은색 면은 반사가 이루어지지 않고 있다. 즉, 둘의 거칠기는 다르다는 것을 알 수 있다.
이 거칠기를 수정하는 옵션도 존재한다.

roughness 옵션인데, default 값은 1로 이를 0.5(50%)로 수정해 보자.

거칠기가 더욱 낮아져서 반사가 좀 더 잘 이루어져 있다.
확실히 확인하기 위해 roughness를 0으로 설정해보자.


검은색 면도 반짝반짝 빛나며 더 잘 반사시키는 모습을 볼 수 있다.
metalness
이번엔 metalness 옵션을 통해 금속성을 지정해 보자

roughness를 0.8로 수정한 뒤, metalnessMap 옵션을 mapMetalic 텍스쳐로 지정해 준다.
그리고 metalness 옵션으로 금속성 정도를 지정해 준다.
default는 0으로 만약 metalnessMap 옵션만 지정해 주고 실행한다면 아무런 변화가 없을 것이다.

우리가 텍스쳐 이미지로 지정한 파일은 위와 같다.
픽셀값이 밝을수록 해당되는 부분이 더욱 금속성이 강하게 나타날 것이다.
결과를 확인해 보자

위와 같이 Sphere와 Box의 테두리를 담당하는 부분이 과하게 금속성이 지정된 것을 확인할 수 있다.

metalness의 옵션 값을 1로 변경시켜 보자
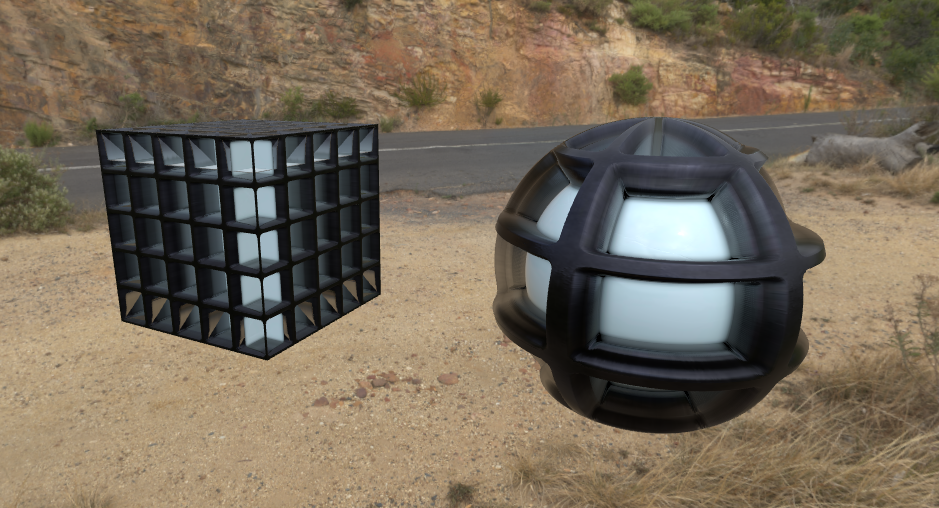
좀 더 정상적인(?) 금속성이 부여된 결과를 확인할 수 있다.
alpha
마지막으로 투명도에 대한 Texture객체인 alphaMap을 알아보자

alphaMap 옵션에 우리가 추가한 텍스쳐 객체 mapAlpha를 지정해 주고
이를 확인하기 위해서 oppacity와 같은 옵션을 사용할 때 사용하는 transparent를 true로 지정해 준다.

우리가 텍스쳐 이미지로 지정한 mapAlpha 객체는 위와 같다.
픽셀값이 밝을수록 더욱 불투명하게 되며, 어두울수록 더욱 투명하게 될 것이다.
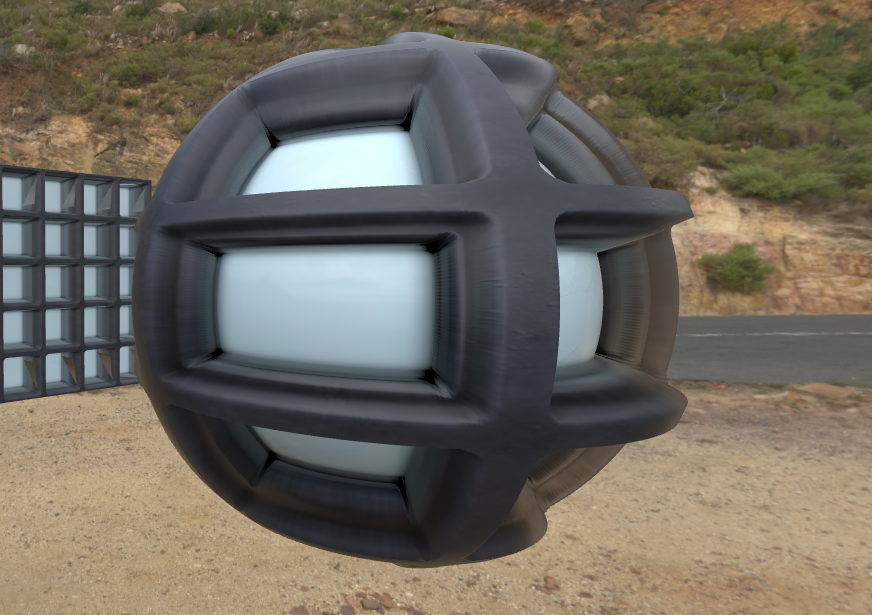
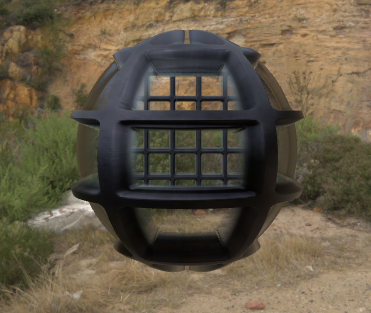
결과를 보자

투명도가 적용되어 모델의 내부가 통과되어 보이는 결과를 확인할 수 있다.
그러나, 투명한 곳을 통해 비춰보면 자신의 모델 내부에 뒷면의 모습이 렌더링 되지 않아 부자연스러운 모습이 연출된다.

그렇기 때문에 material의 뒷면도 렌더링 하도록 side 옵션을 DoubleSide로 변경시켜 준다.
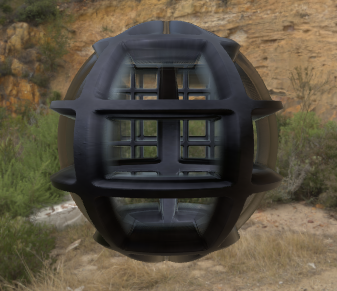
이제 자신의 뒷면도 렌더링 되도록 수정되었다.
결론
Material은 보다 사실적인 3차원 렌더링 결과를 만들어내기 위한 요소이다.

위와 같이 MeshStandardMaterial에서 알아본 Texture Mapping 속성 외에도
Material은 무수히 많은 속성이 서로 긴밀하게 영향을 주고받는 것을 알아볼 수 있었다.
이러한 속성값을 잘 설정해서 우리가 원하는 결과를 만들 수 있도록 학습하였다.
전체 코드(main.ts)
import * as THREE from 'three'
import { OrbitControls, RGBELoader, VertexNormalsHelper } from 'three/examples/jsm/Addons.js'
import './style.css'
import GUI from 'three/examples/jsm/libs/lil-gui.module.min.js'

class App {
  private renderer: THREE.WebGLRenderer //Renderer Field 추가
  private domApp: Element
  private scene: THREE.Scene
  private camera?: THREE.PerspectiveCamera //?를 붙이면 PerspectiveCamera Type이나 Undefined Type을 가질 수 있음.(Optional Properties)

  constructor() {
    console.log("YooHwanIhn");
    this.renderer = new THREE.WebGLRenderer({ antialias: true }) // 안티-알리아스 : 높은 렌더링 결과를 얻기 위해 픽셀 사이에 계단 현상을 방지하는 효과 추가
    this.renderer.setPixelRatio(Math.min(2, window.devicePixelRatio)) // 고해상도에서 깨짐 방지를 위해 픽셀 비율 지정

    this.domApp = document.querySelector('#app')!
    this.domApp.appendChild(this.renderer.domElement) // renderer.domeElement : canvas Type의 DOM 객체

    this.scene = new THREE.Scene()

    this.setupCamera()
    this.setupLight()
    this.setupModels()
    this.setupEvents()
  }

  private setupCamera() {
    const width = this.domApp.clientWidth
    const height = this.domApp.clientHeight

    this.camera = new THREE.PerspectiveCamera(75, width / height, 0.1, 100)
    this.camera.position.z = 4  // (0, 0, 4)

    new OrbitControls(this.camera, this.domApp as HTMLElement)
  }

  private setupLight() {
    // const light = new THREE.DirectionalLight(0xffffff, 1)
    // light.position.set(1,2,1)
    // this.scene.add(light)

    /** HDRI */
    const rgbeLoader = new RGBELoader()  //HDRI를 사용하기 위한 로더 객체
    rgbeLoader.load('./red_hill_cloudy_4k.hdr', (environmentMap) => {
      environmentMap.mapping = THREE.EquirectangularRefractionMapping
      this.scene.background = environmentMap
      this.scene.environment = environmentMap
    })
  }

  private setupModels() {
    const textureLoader = new THREE.TextureLoader() // three.js는 이미지를 로드할 때 텍스쳐 타입으로 해야함

    const map = textureLoader.load("./Glass_Window_002_basecolor.jpg")
    map.colorSpace = THREE.SRGBColorSpace

    const mapAO = textureLoader.load("./Glass_Window_002_ambientOcclusion.jpg")
    const mapHeight = textureLoader.load("./Glass_Window_002_height.png")
    const mapNormal = textureLoader.load("./Glass_Window_002_normal.jpg")
    const mapRoughness = textureLoader.load("./Glass_Window_002_roughness.jpg")
    const mapMetalic = textureLoader.load("./Glass_Window_002_metallic.jpg")
    const mapAlpha = textureLoader.load("./Glass_Window_002_opacity.jpg")

    const material = new THREE.MeshStandardMaterial({
      map: map,
      normalMap: mapNormal,
      normalScale: new THREE.Vector2(1, 1),
      displacementMap: mapHeight,
      displacementScale: 0.2,  //default 1
      displacementBias: -0.15,
      aoMap: mapAO,
      aoMapIntensity: 1.5, //aoMap 강도
      roughnessMap: mapRoughness,
      roughness: 0.8,  //default 1(100%)
      metalnessMap: mapMetalic,
      metalness: 1,  //default 0
      alphaMap: mapAlpha,
      transparent: true,  //alphaMap 사용 시 true 필수
      side: THREE.DoubleSide
    })

    const geomBox = new THREE.BoxGeometry(1, 1, 1, 256, 256, 256)
    const box = new THREE.Mesh(geomBox, material)
    box.position.x = -1
    this.scene.add(box)

    const geomSphere = new THREE.SphereGeometry(0.6, 512, 256)
    const sphere = new THREE.Mesh(geomSphere, material)
    sphere.position.x = 1
    this.scene.add(sphere)

    //const boxHelper = new VertexNormalsHelper(box, 0.1, 0xffff00)
    //this.scene.add(boxHelper)

    //const sphereHelper = new VertexNormalsHelper(sphere, 0.1, 0xffff00)
    //this.scene.add(sphereHelper)
  }

  //실제 이벤트와 렌더링 처리를 다룰 메서드
  private setupEvents() {
    window.onresize = this.resize.bind(this); // html의 size가 변경될 때마다 호출되는 함수(addEventListener 느낌??)
    this.resize();

    this.renderer.setAnimationLoop(this.render.bind(this)) // 연속적으로 render 메서드 호출(모니터 Frame에 맞게)
  }

  // html창 resize시 호출할 함수
  private resize() {
    const width = this.domApp.clientWidth
    const height = this.domApp.clientHeight

    //앞선 setUpCamera에서 설정한 camera 정보를 다시 수정해줌.
    const camera = this.camera
    if (camera) {
      camera.aspect = width / height
      camera.updateProjectionMatrix() // 카메라의 값이 변경되었다면 수정하도록 함.
    }

    //renderer도 마찬가지로 사이즈 수정함
    this.renderer.setSize(width, height)
  }

  private update(time: number) {
    time *= 0.001 // ms -> s 단위로 변경
  }

  private render(time: number) {
    // time : setAnimationLoop의 값에 의해서 결정되는데 단위는 ms
    this.update(time)

    this.renderer.render(this.scene, this.camera!)
  }
}

new App()'three.js' 카테고리의 다른 글
| [three.js][typescript] - Light(2) (1) | 2024.07.16 |
|---|---|
| [three.js][typescript] - Light(1) (0) | 2024.07.15 |
| [three.js][typescript] - Material(6) (0) | 2024.07.11 |
| [three.js][typescript] - Material(5) (0) | 2024.07.10 |
| [three.js][typescript] - Material(4) (0) | 2024.07.10 |


